Thursday, August 23, 2012

One Day Extended Pemi Loop - 8/18/2012

On Saturday, August 18th, I set out on an attempt to complete a one-day extended Pemi Loop. The "Pemi Loop", short for Pemigewasset Loop, is an amazing and difficult traverse of the mountains surrounding the Pemigewasset Wilderness in the White Mountains. The "basic" loop is 31.5 miles over eight of the AMC White Mountain 4000 footers, but this would be a 38.6 mile jaunt including four additional 4000 footers, for a total of twelve in one day. My thought process for choosing this hike: 1) I needed all of the 12 peaks for July, 2) I'm planning the same hike in winter as a 2 day trip, but also adding Hale (maybe) and 3) because I LOVE THE PEMI and waking up early for a summit sunrise and the chance of a beautiful afternoon finish on the Bonds - why not?!

I had been thinking about this hike for a while, so I was very prepared. My pack was 14.1lbs without water and contained all of my regular day hike stuff, plus a hammock, emergency bivy, emergency tarp/blanket, extra socks, and a pant and shirt base layer. If i needed to stop and rest or just wanted to stay the night, my Spot messenger would have let my family know. Before any large adventures, I always make it a point to be sure I hydrate well the day before, which I did.

On Friday afternoon, I came home from work and had a nice steak dinner. After that, it was time for bed. my pack was already ready. I arrived at Lincoln Woods just after 2AM. I was crossing the bridge in the darkness at 2:30am. The air was heavy, damp, and a little misty. I was off to a good start with long strides and occasional jogging, but not too fast so not to run into any night time surprises on the trail. Its funny that I've hiked the Osseo Trail twice, but never in daylight. The Osseo Trail is a really nice ascent to the Franconia Ridge. I made it to the summit of Flume in two hours. It was pitch black, and I could only see the lights down in the notch without my headlamp. With my headlamp, I could see the fog hanging there. My sleeve-less shirt was already pretty wet from hiking through the fog as reached the ridge. With not much to see yet, I was quickly off to Liberty.
Mt. Flume summit
Mt. Liberty summit (did someone just build this cairn in last few weeks?)
As I popped out onto Little Haystack, the light was up. The Pemi was socked in on my right, and to the left there were fast moving clouds that occasionally dissipated reveling a sweet undercast with the sun glowing a yellow-orange on the horizon. Wow what a great start, I'm just getting to the exposed ridge for this sight.
Little Haystack summit
Franconia Ridge Trail about to leave Little Haystack
From near the summit of Little Haystack
The clouds broke more as I made my way over Lincoln, North Lincoln, and then to Mt. Lafayette. This is where I got the best view of the undercast. As I looked over towards Cannon it looked as if a huge glacier was actively moving down from behind it. I had to stop for a quick moment here to just watch what was happening around me. It took me four and a half hours to get to Lafayette.

Really white cloud looked like a moving glacier


Lafayette for the 6th time
I left Mt. Lafayette, and now started the most difficult sections of the Pemi Loop. I looked towards Garfield and to my right, and the clouds still had everything socked in....except for the tip of Mt. Garfield, which was my next destination. That was pretty cool, except it was pretty cold real quickly, so I had to put on my jacket  here until I got moving again in the trees, but that didn't come as quickly as I was thinking. I still had the shoulders of Lafayette to contend with. Oh yeah, I forgot about this section, because last time I was lost on it in the middle of the night. My hands were even getting cold here, which was reminding me that fall is coming, but I didn't need to put on my gloves.
Now starts the Garfield Ridge Trail (love how this one came out)
Mt. Garfield summit and beyond surrounded in clouds
The Garfield Ridge Trail is 6.6 miles and 1,700 feet of elevation gain over gnarly rocky trail which is often wet. Despite that, I feel the final ascent of Garfield is easiest from this way. I made the summit of Mt. Garfield around 9am, and at the summit I couldn't see much. I remember taking a 5 or so minute break to rest at the summit.
Garfield Ridge Trail 
Mt. Garfield summit
As I started to descend, I saw the first hikers of the day. The waterfall section off Garfield was going really good and required a good amount of attention. The trail (the entire day) was wet, and a wet Garfield Ridge Trail is not an easy trail. It goes up and it goes down, which is probably why my knees are still screwed up 5 days later. I still managed at the time though to give you all a thumbs up for halfway done ;)


Next up was Galehead Hut and Galehead Mountain. I was now sort of between the clouds looking out into the PemiGalehead for the 5th time. Quickly, I was back at Galehead Hut, and re-filled completely without even taking my pack off. I was empty. Dreadfully, I continued jumping on the Twinway up to South Twin - no breaks here. I've always disliked this section of trail, but for some reason, it went by more quickly this time, and it wasn't as big of a deal. On South Twin, for the 5th time in five different months, it just wasn't making it out of the clouds yet.


I didn't drop the pack for North Twin. I was surprised that I was still on pretty decent time, but I wanted to push it through these out and back and get to the Bonds with time to play with. I had made it from South Twin out to North Twin, and all the way back and over to the Bondcliff junction in about two hours, which is 4.6 miles over the North Twin Spur and the Twinway.
From North Twin summit view point
For Zealand, I dropped my pack at the sharp corner on the trail after a sharp descent from Guyot. I clipped the Spot to me and took my half-filled water bottle and got to the summit of Zealand. A kind couple took my photo, but I thanked them and was off so quickly, I completely realized that I forgot to ask if they wanted a photo, I'm sorry! I was back at my pack, and then just that bit of elevation gain later, I was back on Guyot, above treeline, the sun was shining, and I could see that it was shaping up to be a spectacular Bonds traverse!
Zealand summit!
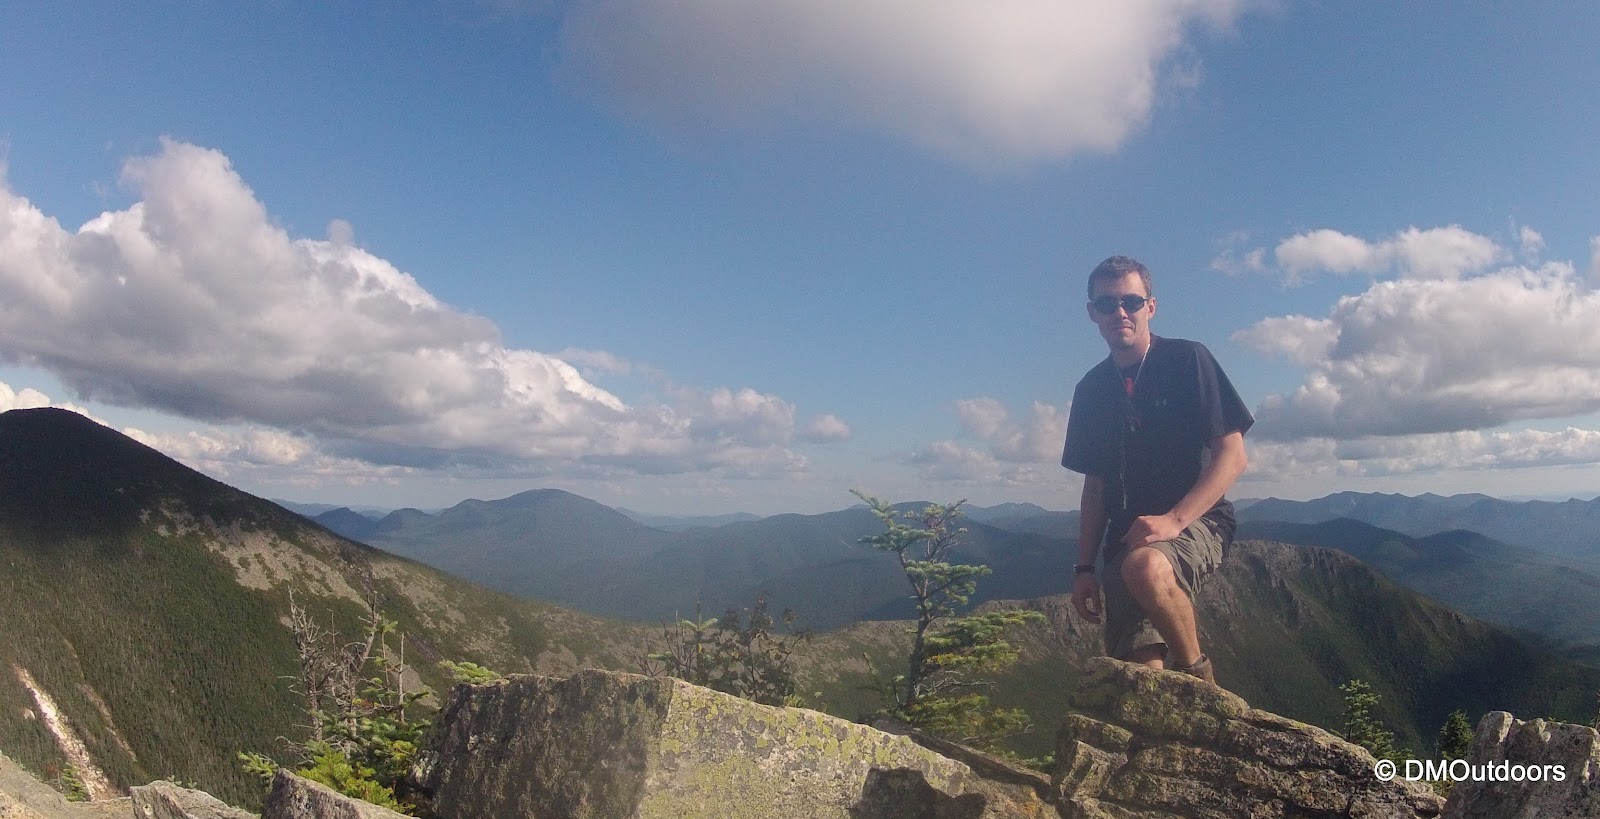
I passed several hikers on Twinway and Bondcliff Trail. It's active in the late afternoon because of hikers going to the Guyot Tent Site. I dropped my pack at the West Bond junction, grabbed my cameras, and continued to West Bond. The view was absolutely amazing, and the weather was just awesome. Another hiker was enjoying the afternoon there when I arrived. West Bond is truly an awesome remote peak. It's hard to get to, so its good to enjoy for a few minutes, and that I did.
On West Bond summit - 4th time, 4th month
The ridge from Bond to Bondcliff from West Bond
Shortly after, I was back on the Bondcliff Trail and walking up to the summit of Mt. Bond. The view from here provided another amazing lift to the energy and spirits. You can't see anything but mountains, no roads, nothing but clouds, shadows, mountains, birds, and exposed ridge-line at your feet. There was just a light breeze.
Summit of Mt. Bond
On my way to my last peak of the day - Bondcliff
The descent down from Bond to the flatter part of the ridge was torture. Just this short section is rock hopping irregularly placed rocks that just kills the legs. Then you get to where the picture above is taken and its a little easier. I was tired as you could imagine. My legs actually started to get real sore around Galehead, but now it was mounting up on the legs. Despite that, I reached Bondcliff, my 12th 4000 footer of the day, and essentially success with only the 8+ mile jaunt out remaining. I slowly walked right out onto the cliff, one of the most magical spots to be in all of the white mountains.
What a day!
Bondcliff overlooking the Pemi Wilderness
Bondcliff
Descending the Bondcliff Trail was just brutal on my legs. They were hurting, and I slowed tremendously. I was still on for my target time. As I was within the trees, the light of day faded. I passed maybe 5 or more people on the Bondcliff Trail camping out with fires ablaze. I was surprised, but after that, I needed my flashlights and head lamp. It was incredibly dark, and it was a long torturous walk out, trying to stay on the flattest path possible because the railroad ties were just busting my legs. It was sort of a surreal moment to realize how prepared I thought I was, and when I went to change the battery in my flashlight, the extra battery wasn't there like it always is. Both my headlamp and flashlight were dimming as I made my way past the Osseo Trail. I knew I was going to make it before they completely died, but if you haven't hiked at night in the mountains, you have no idea how dark it gets. Double check your batteries, and always bring more than one source of light. I made my way over the Pemigewasset River footbridge some 20 hours and 10 minutes, and 12 mountains later, and as I looked up on this beautiful night, safely with my lamps off, I saw the milky way and potentially the most stars I've ever seen from this very spot at night. I hobbled to my car and went straight to McDonald's. My knees hurt so bad in the car, and I was falling asleep after eating, so I pulled over to get some quick sleep. Eventually I woke, and arrived home at 4am. A totally kick ass hike and experience if you ask me! Now lets see if I can do this bad boy in the winter plus Hale, even if it takes all weekend.
Bondcliff Trail
Please, I do not recommend anyone attempt this hike in a day unless you bring all of the gear necessary for a possible night out.

Hike Stats
Trails: Lincoln Woods Trail, Osseo Trail, Franconia Ridge Trail, Garfield Ridge Trail, Frost Trail, Twinway, North Twin Spur, Bondcliff Trail, Wilderness Trail.
Distance: 38.9 mi.
Elevation Gain: 12,485 feet
Book Time: 20hrs 10min (2:30am to 10:40pm)

Tuesday, July 31, 2012

DMOutdoors: Documenting the Adventures - 100th Post!

I never imagined having an outdoor blog where I would go on adventures on most weekends and share them with the hiking community and the world, basically. Never did I imagine I would write and publish 100 posts, mostly trip reports. This post is my 100th published post to DMOutdoors! For the occasion, I thought I would share a little more in detail about what I do to document my adventures besides writing them out and putting words next to pictures. As much as it is for my own personal keepsake, there's also something cool to me about coming back home and trying to write a trip report people will remember. My 4th post ever, titled Filming In the Outdoors, which was posted in November of 2010, was a brief post about me shooting videos in the outdoors, and early thoughts as I had just picked up this hobby. That was then, and this is now....

That Olympus Tough 8000 I was using had been lost in the mountains over a year ago (I still want to try to find it, and have attempted once already since the memory card should survive forever inside), but I had since purchased the next model up a couple of months after that (TG-810), and it still works like new, and is what I'm using now. It shoots 14MP photos and 720P HD video. In addition to that camera, I have a GoPro Hero2 (Outdoors Edition) which takes photos and HD Video in up to 1080p. For both cameras, I always carry two batteries.

The Olympus TG-810 is completely waterproof and shockproof, just like the previous model. It can sustain falls to granite rocks, scraping on ledges, and it shoots underwater videos without a worry of it getting ruined (as long as the door is shut properly, of course). It does still lose battery in cold weather, though. I most often carry this camera in my pocket and use it for point-and-shoot photos for the duration of any of my adventures. I will use the self-timer on this camera a lot, but have found myself taking more self-timed shots using the GoPro, especially at summits and in good lighting. Any photos in low light are done with the Olympus because it has a flash. I used the Olympus camera for my photos and videos in my Tuckerman Ravine climb....I wish I had the GoPro for that one...
Using Olympus TG-810 on Monopod - Whiteface ledges
From underwater in the Pemi River - (swimming after Bonds hike)
The GoPro camera is an amazing piece of equipment. Each adventure, I find myself coming home with 500+ photos, and along with the videos over 10+ GB of media to go through between my two cameras. This might explain why it takes almost a week to bring you the trip reports. The features I use the most on the GoPro are the video function, photo function, and timer photo function. I've yet to play around with some of the additional functions. The video angle can be changed to wide, medium, and narrow. My Winter Presidential Traverse video was shot using the medium angle (it was my first time using it), and most of my recent videos after were using the wide angle. The wide angle is best used for video recording (and photos) above tree-line and when expansive or dramatic views are present, and the medium angle is best  for in the trees and always under good light. One of the other cool things is the ability to mute the beeping with the button-presses. This is good if you're going to be around other hikers, and its also good to have it ON in the winter, or when you can't see the screen to see the function you're on. Its a learned practice - three beeps from Video to Self-timer and three beeps back to Video. I use a 32GB SDcard in my GoPro (and carry much more), so when I fill that up, you know its an epic adventure.
GoPro Chest Harness on Solo Presidential Traverse 
Glissading the South Slide of the Tripyramids GoPro head strap mount
Using the GoPro sticky mount on Gardner Pond, Northern Maine
Photo quality on the GoPro can be changed between 11MP, 8MP, and 5MP and wide or medium angles. When I'm above treeline or there are views, and I'm not shooting video, I'm likely using the GoPro to snap photos. For the regular photo function, you push the button and about one second later it snaps the picture. The timer function on the GoPro is its best feature, I believe. I can set the camera down and have it take photos every 2, 5, 10, 30, or 60 seconds. When I'm on a ridge line, I might hold the camera and swing it left to right (as if I was video recording), but really it's snapping a photo every two seconds. I bet many of these pictures I could go back later and make some amazing panoramic photos (which I am AWFUL at doing in the field with my Olympus). This timer function is how I've gotten some of my favorite photos, including on Mt. Whitney'. At the same time, I end up with hundreds of random, unplanned shots like the one below - most of which I don't include in my online albums.
Timer function on - random awesome photo from summit of Mt. Whitney
Morning start 
Afternoon finish
Occasionally, I like to capture a video or action photo of my passing by on the trail, such as I did above Tuckerman Ravine, after I reached the top of it, or recently on Franconia Ridge, I did it twice. This adds a change to some of my videos to break up the point-of-view angle. Yes, this requires me to go back and get the camera sometimes. I've done this in the middle of summer and also below freezing during my solo winter Presidential Traverse. Check out the video below, I made specially for this post. This video has several clips of the raw footage from some of the times I recorded a clip for fun. Some of this video you might recognize, but will see parts that were cut out, and some you haven't seen before. Subtitles will tell you about the clip.

So what do I use to mount my cameras? Well, since I started hiking, I've used a few different items to do just that. Mostly, I've used a Joby Gorillapod Original tripod. These are awesome for use with both the Olympus Tough and Go-Pro cameras (or any camera with a screw mount), and cost $20 each at many electronic and outdoor retailers. Although I am not certain its the cause, I've seemed to have bad luck in cold weather with the Original-sized Joby tripods both regular and the Magnetic model ($25). I've gone through about four Originals and one Magnetic since I started hiking, and they have all broken (mostly in winter) except  for my newest one. One of them is still somewhat usable if I wanted, but its shortened. The magnetic model is awesome because it sticks magnetically to most rocks, and was slightly more durable than the original. This is perfect for windy summits. Currently, I am no longer using an original sized tripod, and recently upgraded to the Joby Gorillapod Hybrid, which is heavier duty than the Original, and also comes with an attached level. It has a ball-head for flexible movement when already mounted, unlike the original size. With the tripod, I can place it on a rock or tree with ease to capture a view or me passing by. I can also still secure this larger tripod to my pack strap, where it is not perfectly comfortable, but its do-able as an alternative to the GoPro head strap or chest harness, if I so choose. I am waiting to see how long the Hybrid model tripod holds up this winter. If it cracks in the cold weather, I'll be looking into some sort of flexible and wearable tripod that won't bust under frigid conditions.
GoPro on Joby Gorillapod Hybrid - strapped to pack strap - Mt. Whitney
On some adventures, I've used an xShot 2.0 extending monopod. Although I use it much less than I did when I first picked it up, it packs the best. Its good for shooting video of the trail in front of you, but sometimes the scratching, extending, and clicking of handling the monopod comes up on the videos. The provided screw loosens easily on its own. For holding the camera out in front of me for video, the larger Joby Hybrid tripod is rubber and doesn't make any noise. For this reason, I only bring the extending monopod on certain adventures.
Recording the adventure on Moosilauke
xShot monopod with mounted GoPro on North Slide of Tripramid
Lastly, I recently picked up a lightweight monopod trekking pole. I used this during my climb of Mt. Whitney, and it actually worked great. I don't normally use trekking poles, but on certain hikes, I might pack one pole just in case, and this one is it, since its lighter than any one of my other trekking poles, and serves two purposes instead of one. You will see it in this video (only 1min) from Mt. Whitney.

There you have it! - a behind the scenes look at how I capture just about every adventure. 

As this is my 100th post, I would like thank all of my readers, and Twitter, Facebook, and YouTube followers! Your comments are always so kind and appreciated. I remember when I first started, I would look at the stats and be excited that I got 100 hits in a month. The last month that DMOutdoors had less than 1000 hits was October 2011, nearly a year ago. For the last 4 months in a row, there have been over 2,000 hits per month. It only makes me want to go climb more peaks and do more crazy adventures! Thanks!!!!!